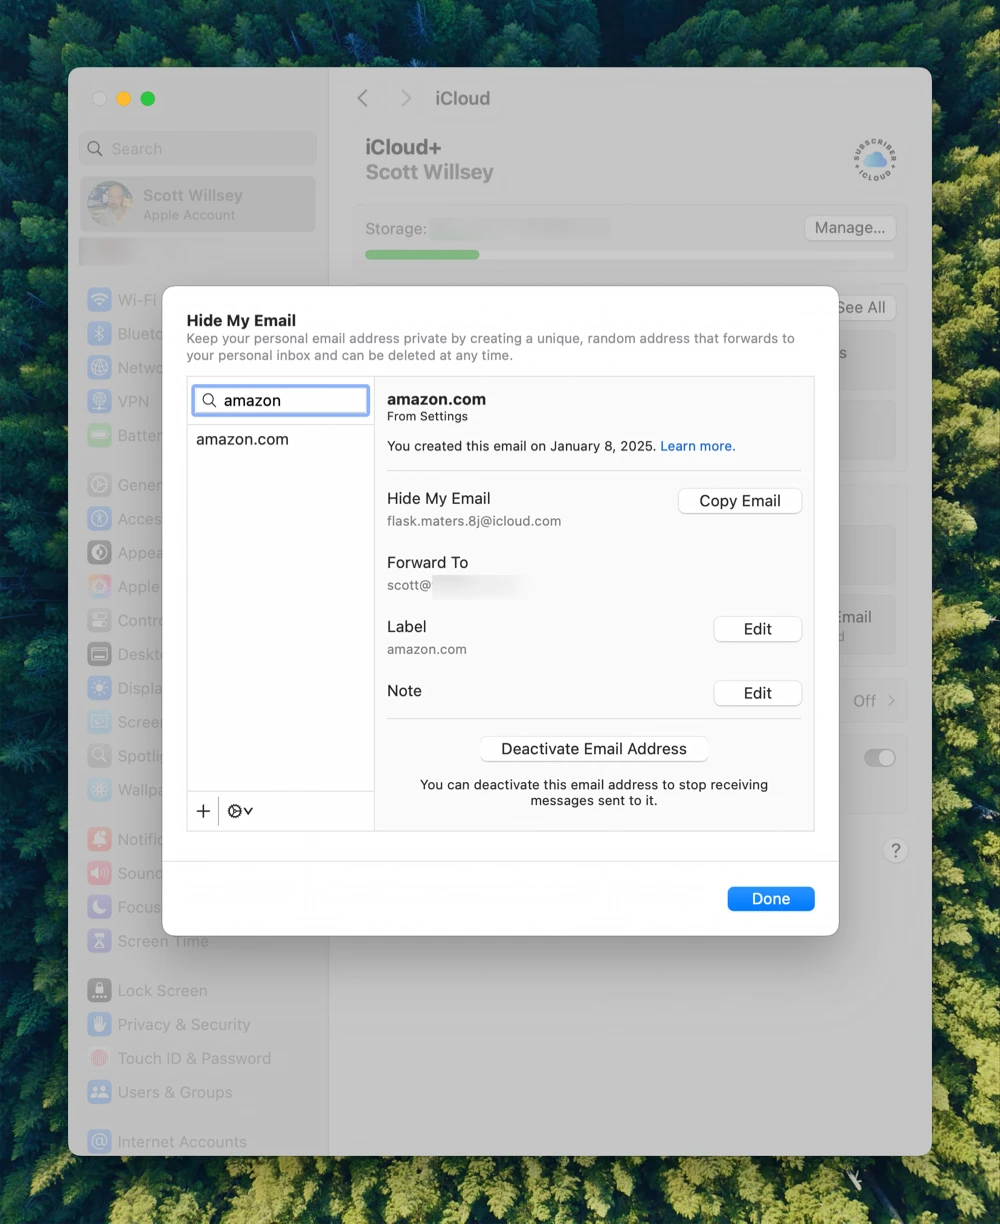
Hide My Email
Apple has a feature called Hide My Email that creates a unique, random email address which forwards to your iCloud email address. This is used to hide your real email address from websites and services that you sign up for. This is a great way to keep your email address private and reduce the amount of spam you receive.
How to create a Hide My Email address
Section titled “How to create a Hide My Email address”There are two basic ways to create a Hide My Email address.
- You can create one when you sign up for a new service, or,
- You can create one in the iCloud settings on your device.
Creating a Hide My Email address when signing up for a new service
Section titled “Creating a Hide My Email address when signing up for a new service”When signing up for a new service on the web, you can create a Hide My Email address right from the sign-up form.
- Click in the email address field on the sign-up form.
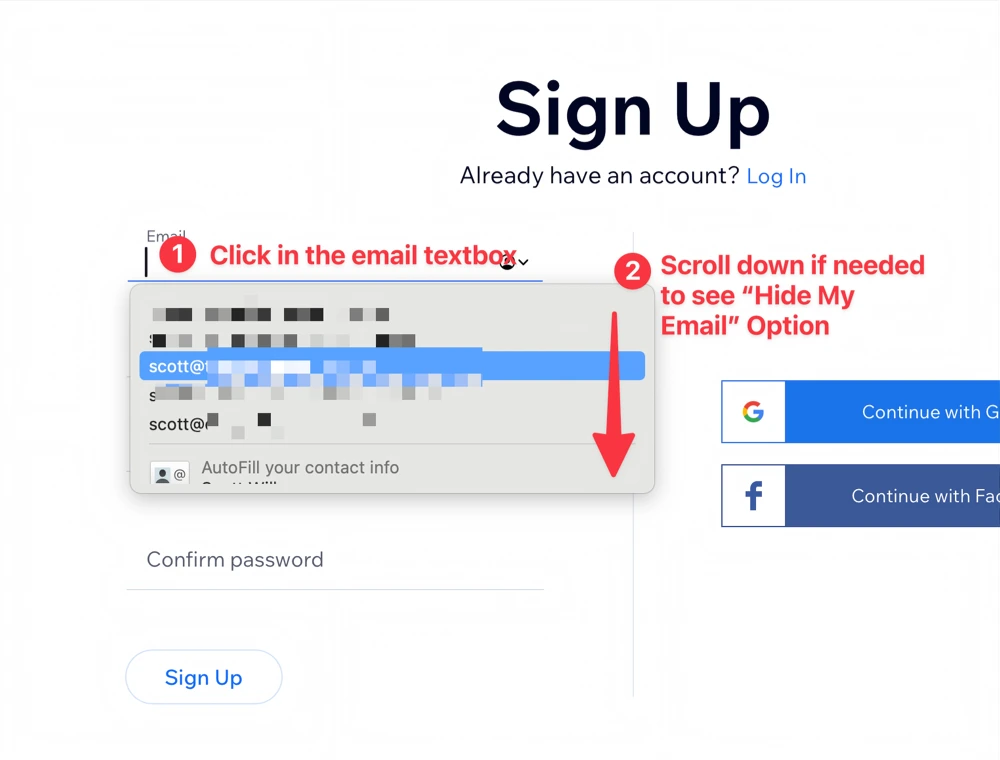
- Click the “Hide My Email” option that appears in the dropdown list. You may
have to scroll down in the dropdown list to see it. NOTE: If you don’t see
the dropdown list appear, click outside of the email text box and then back
inside the email textbox.
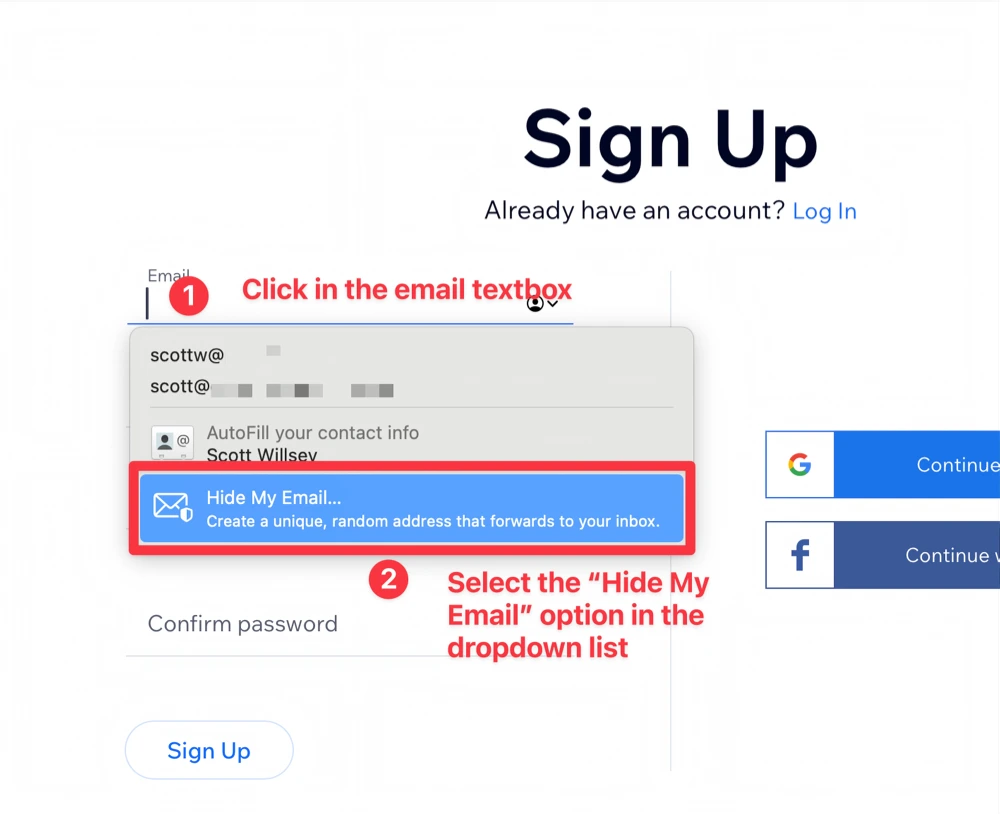
This will create an email address for you that forwards to your iCloud email address and save it in your iCloud settings automatically.
Creating a Hide My Email address in iCloud settings
Section titled “Creating a Hide My Email address in iCloud settings”You can also create a Hide My Email address directly in the iCloud settings on your device. You will have to then copy and paste the Hide My Email address into the sign-up form.
- Open settings on your Mac or iOS device.
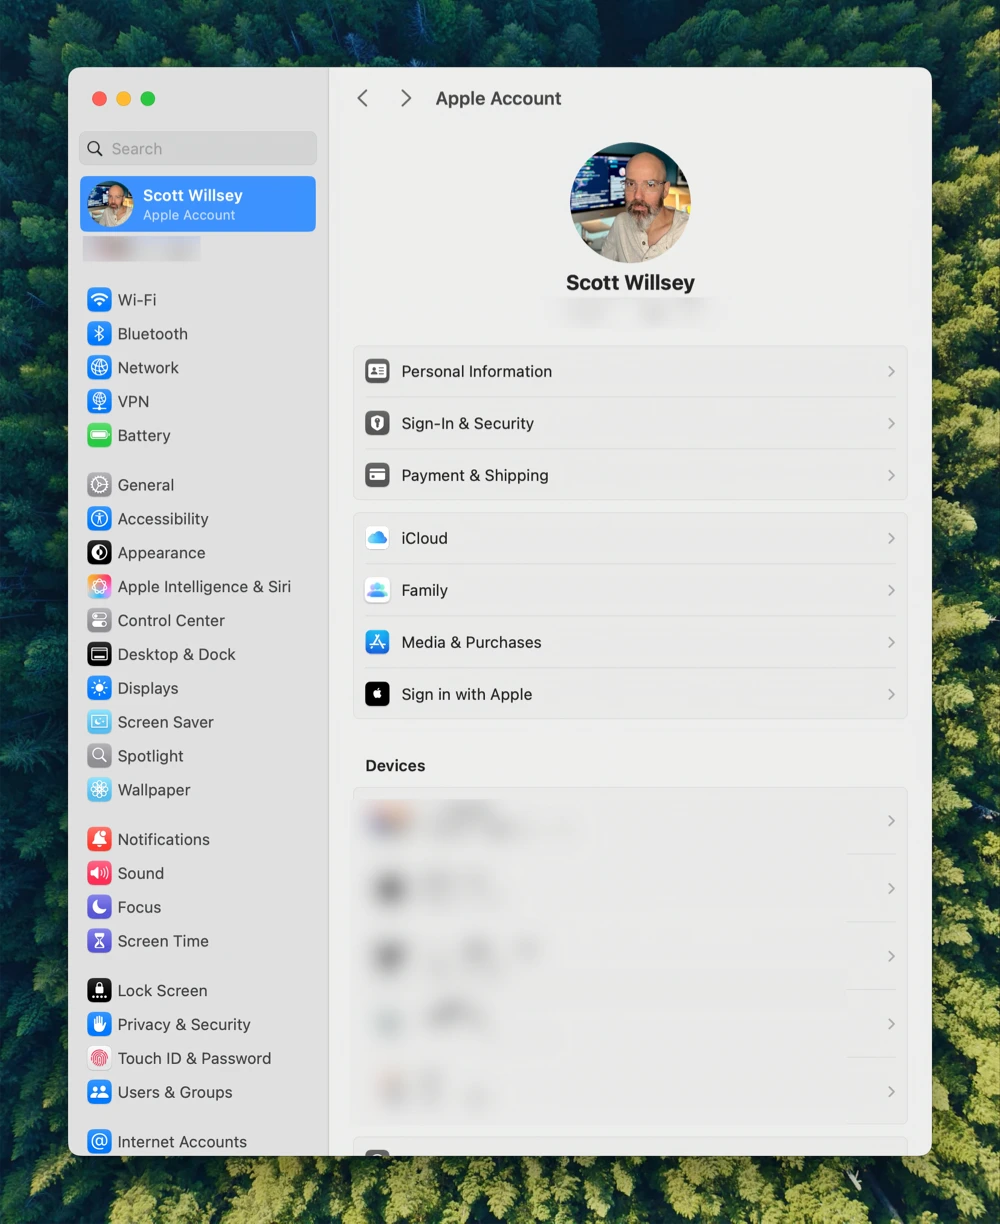
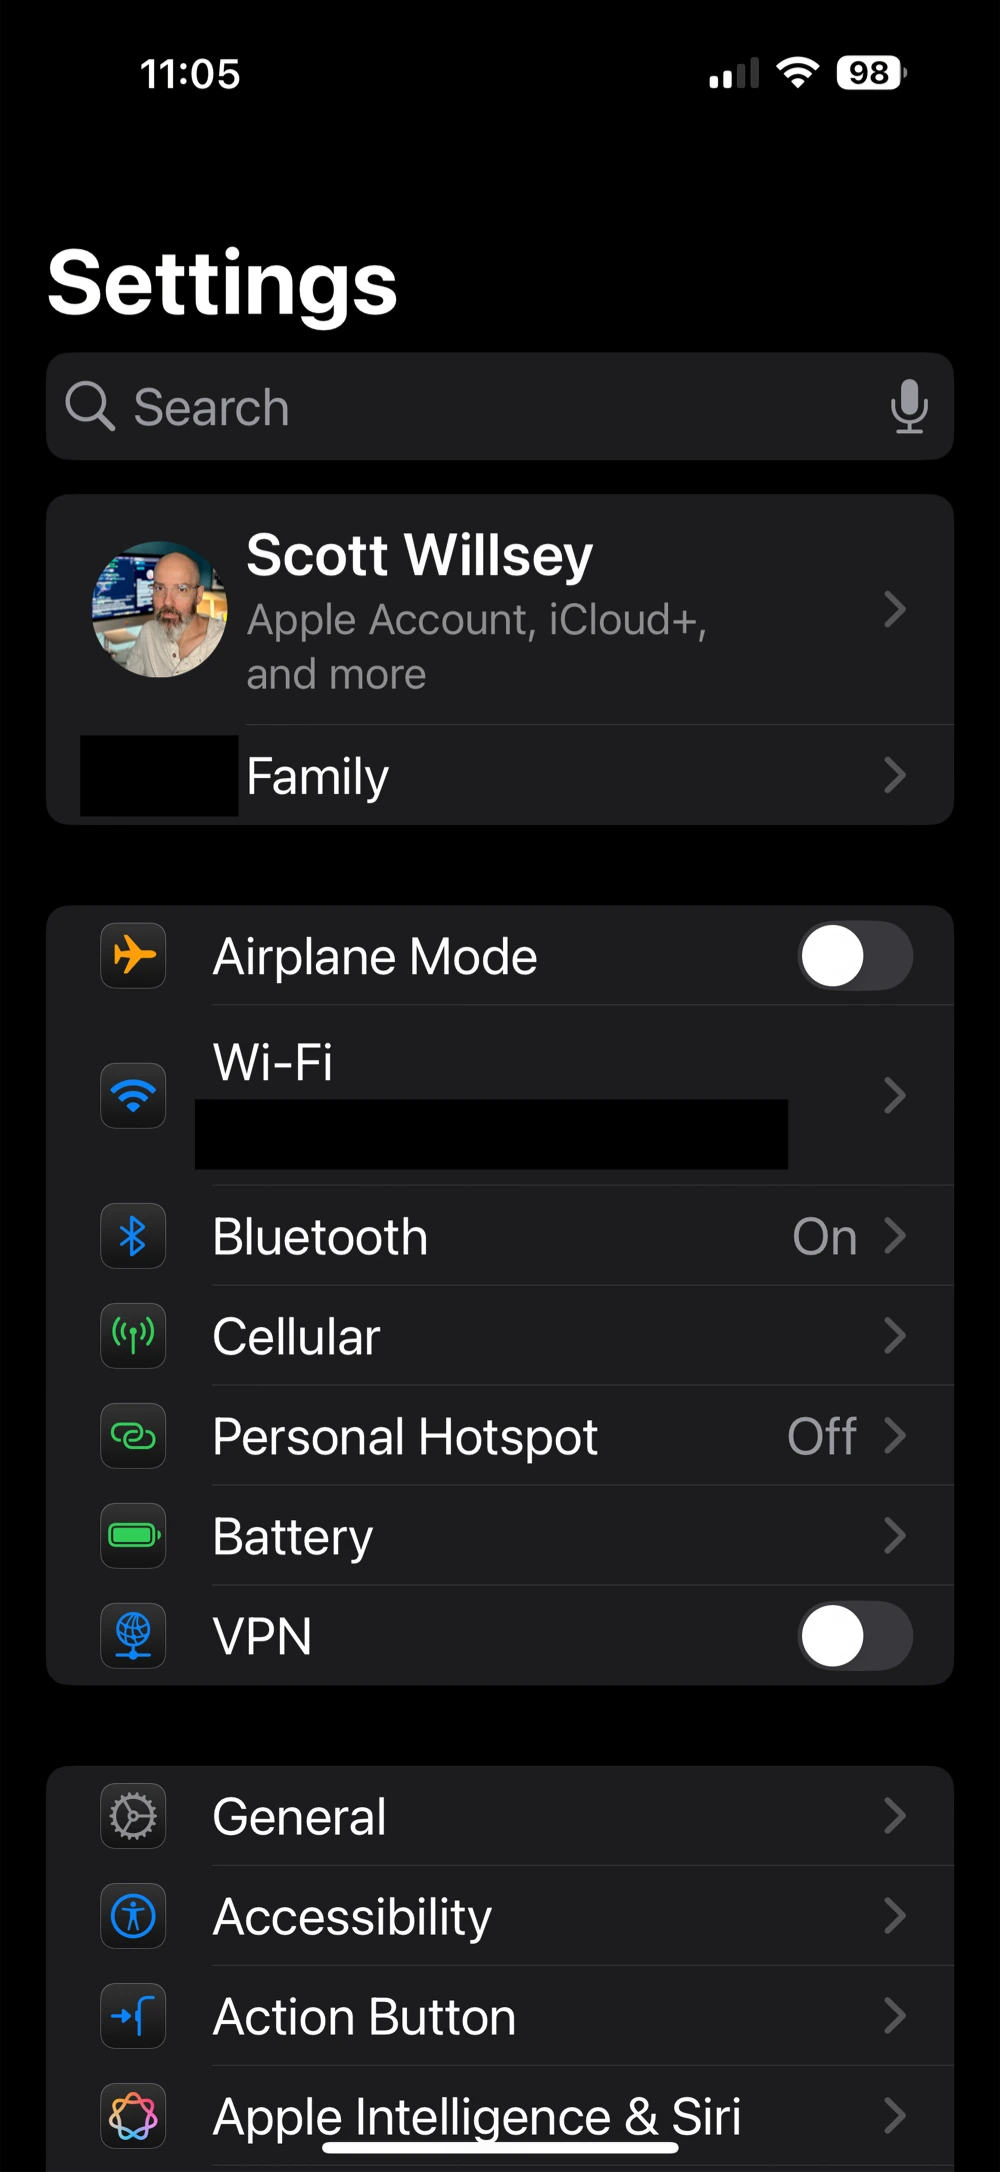
- Tap on your account name at the top of the settings screen. Tap on “iCloud”
in the list of options. Under iCloud, tap on “Hide My Email”.
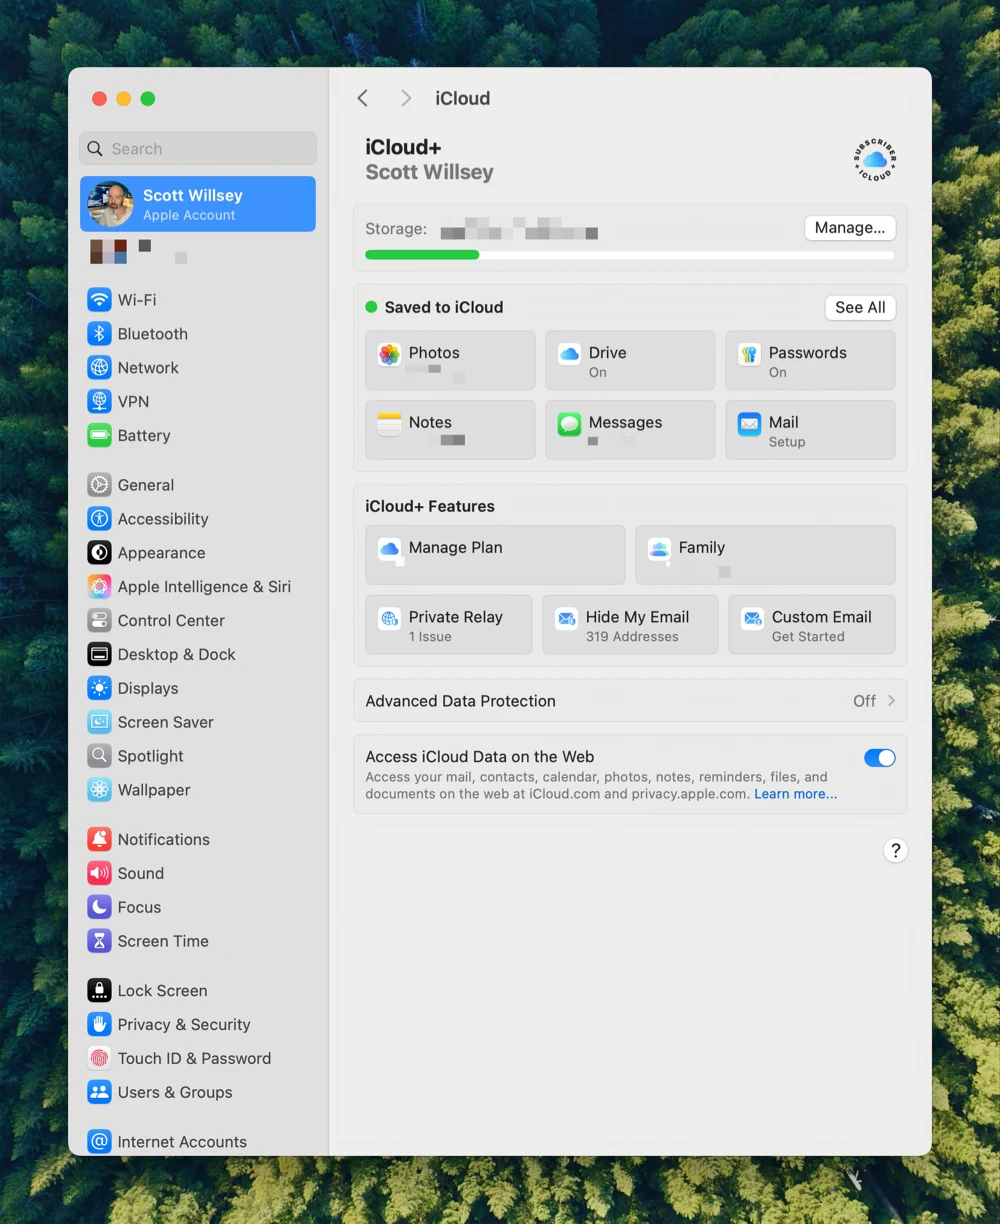
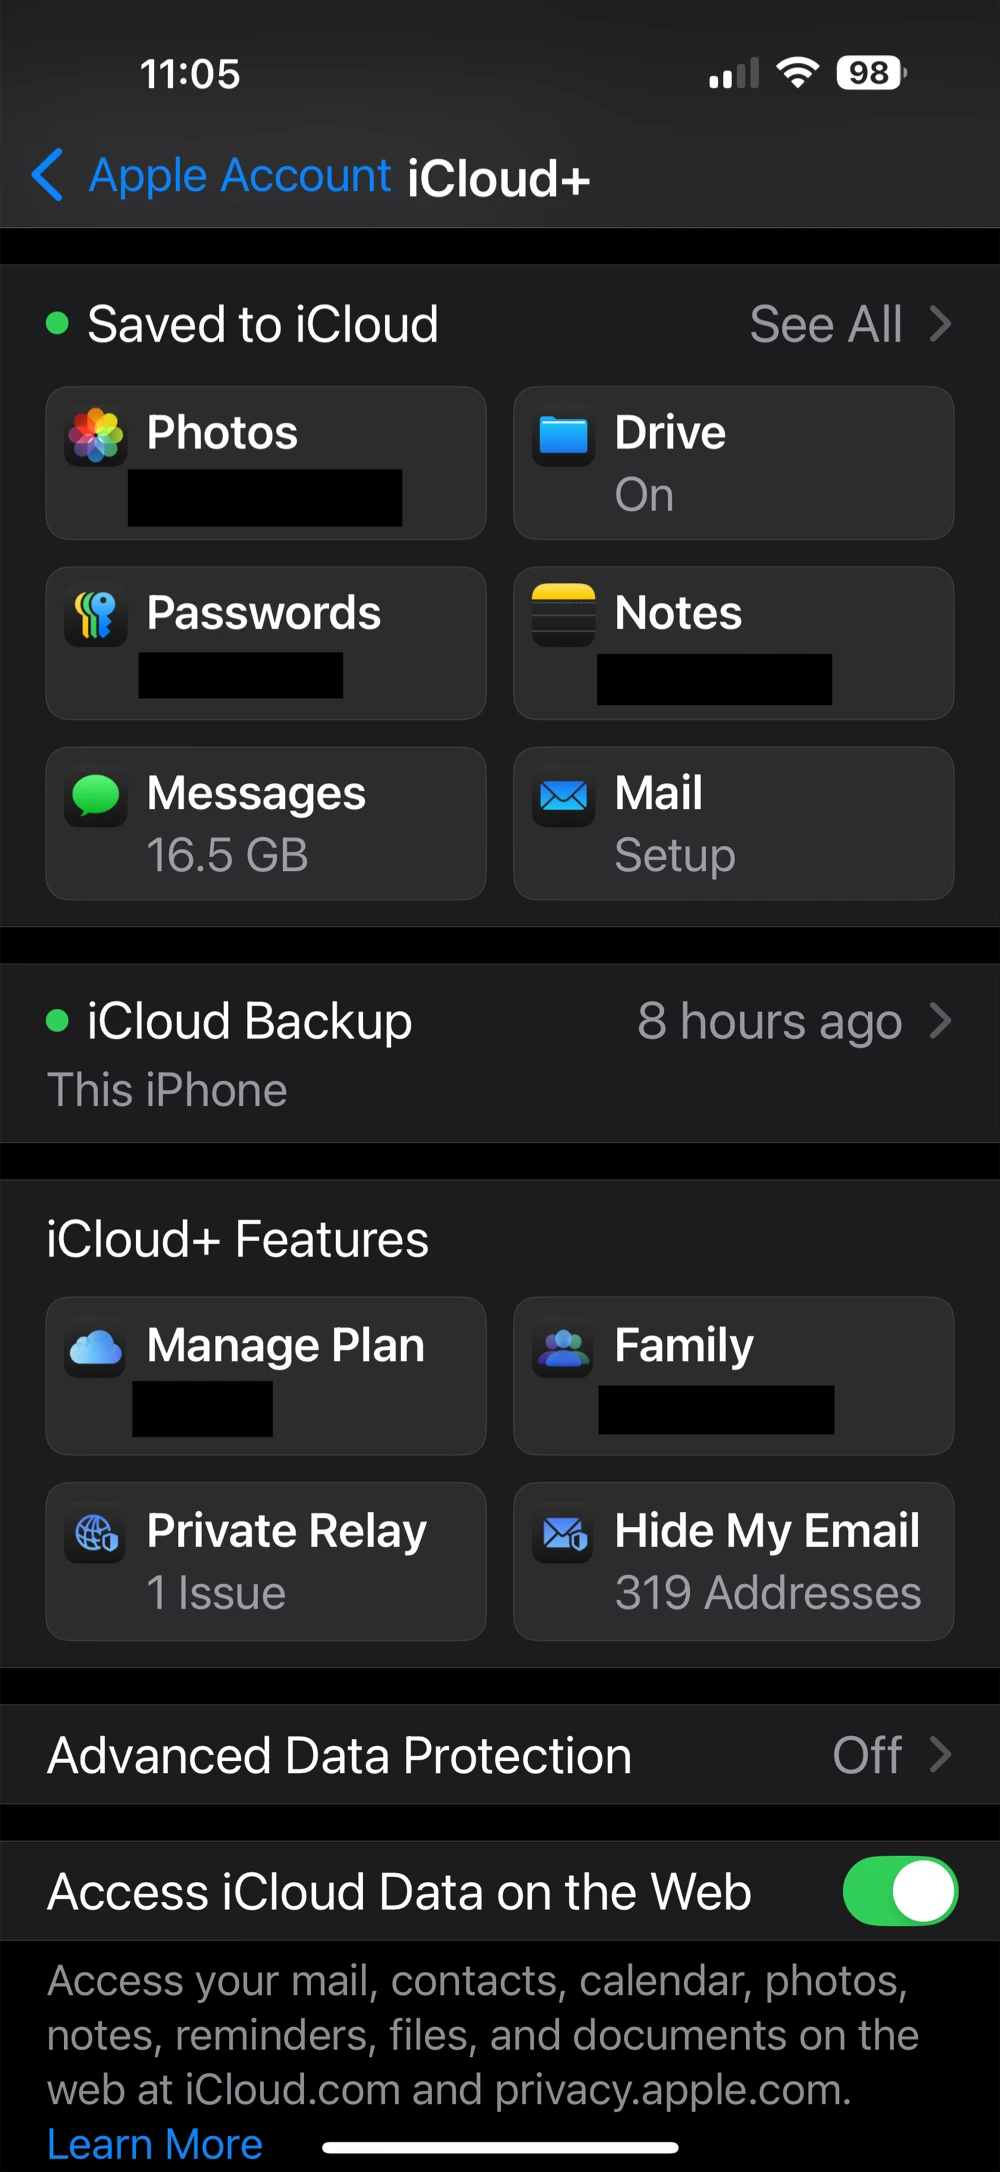
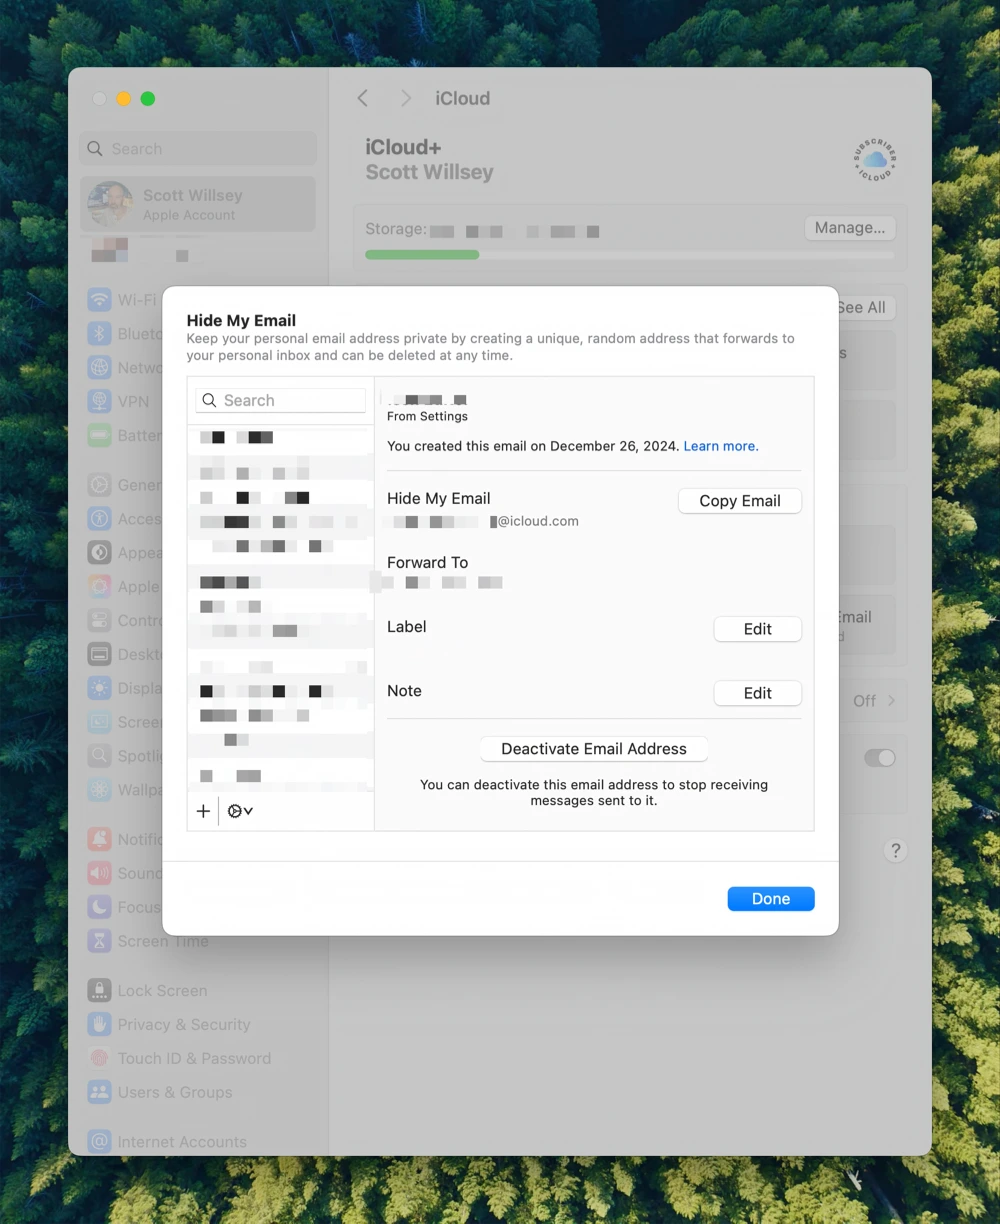
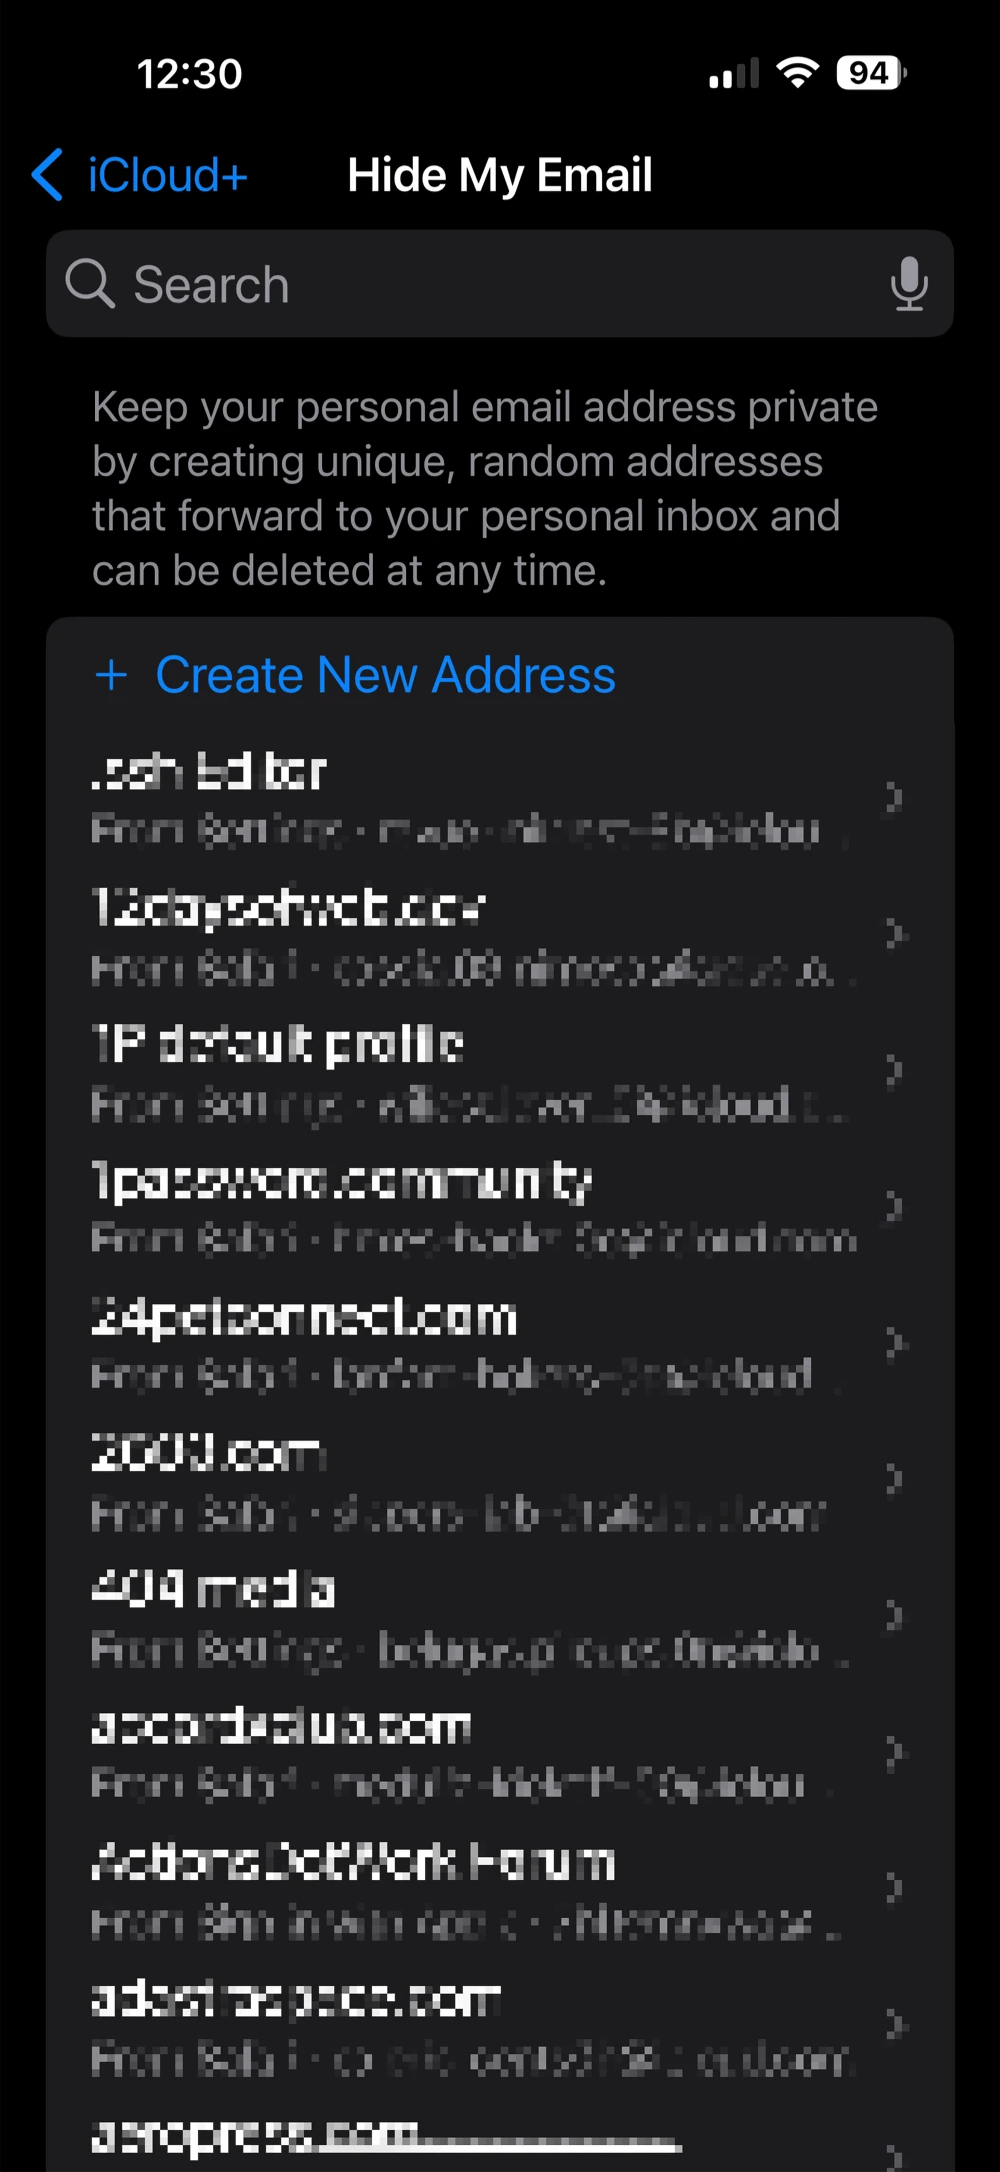
- The Hide My Email screen will show a list of any existing Hide My Email
addresses. On the Mac, tap the ”+” to add a new one. On iOS, tap ”+ Create new
Address” to add a new one.
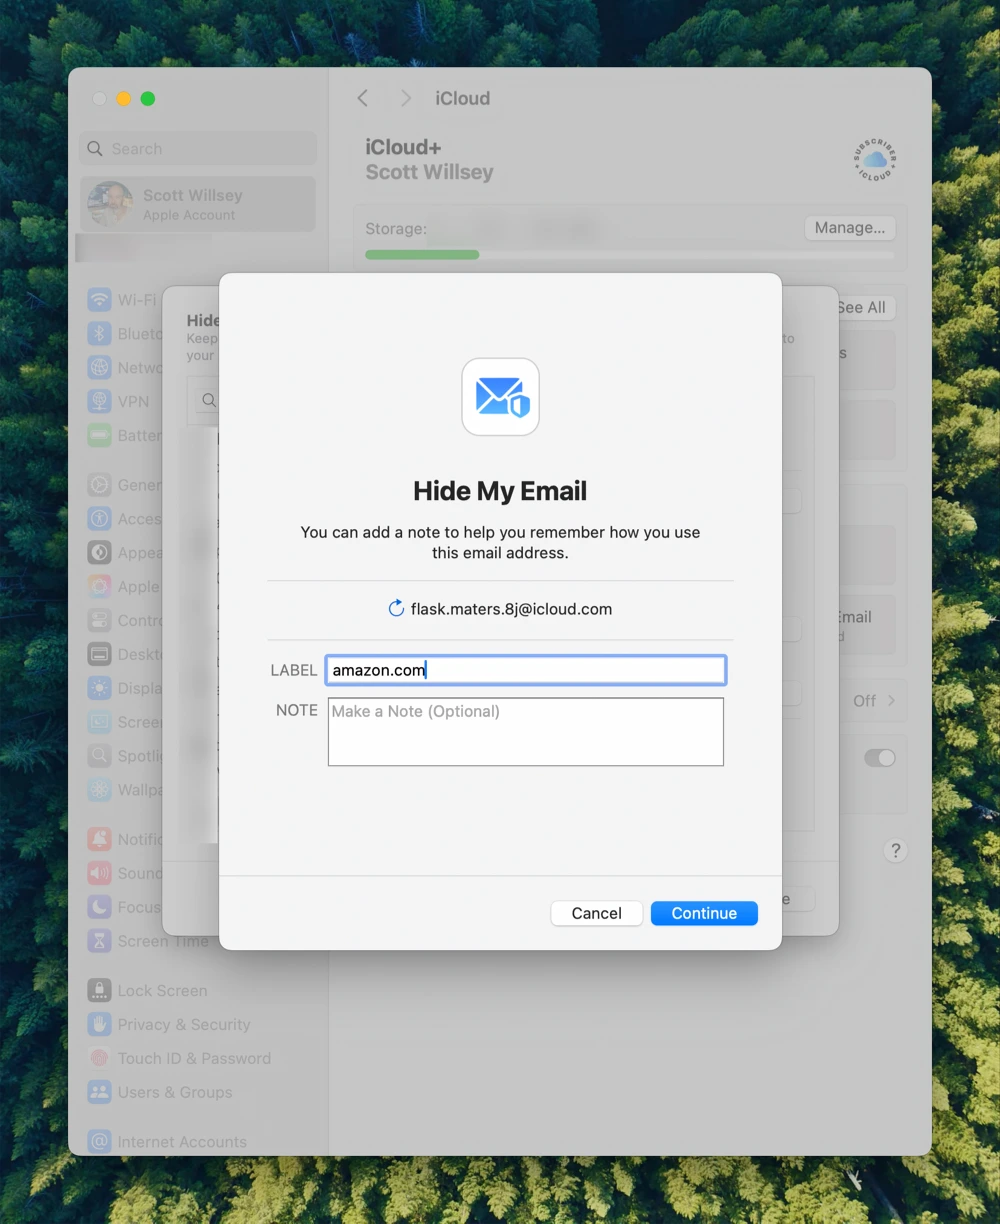
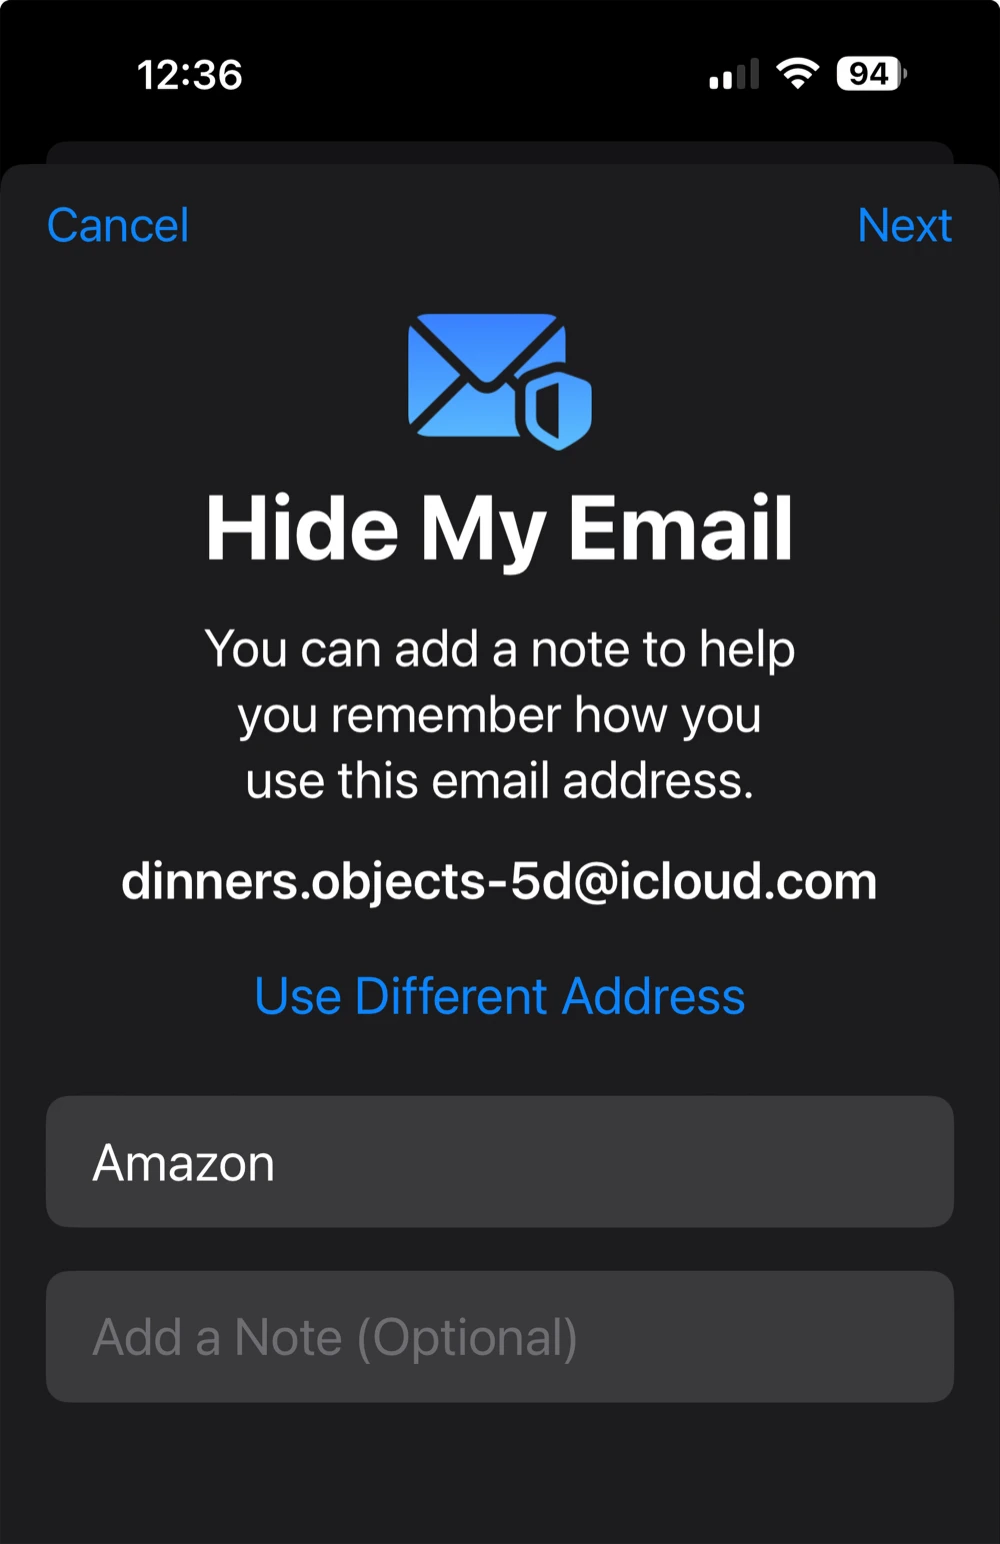
- Hide My Email will create an email address. Add a label for yourself so you
can remember what site or app the email address is for. This will also help
you search for it in the future. On the Mac, click the “Continue” button. On
iOS, tap “Next”.
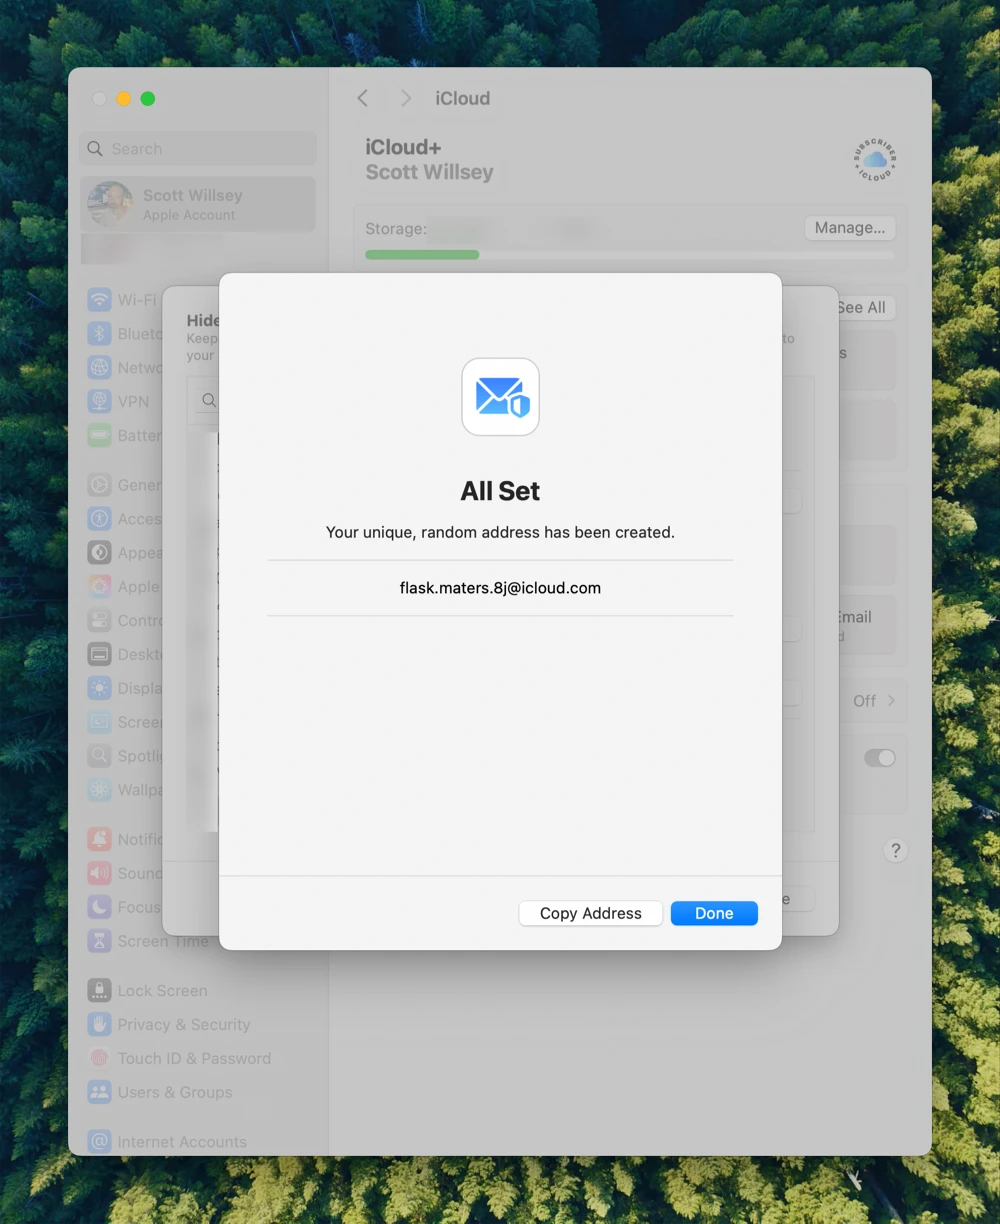
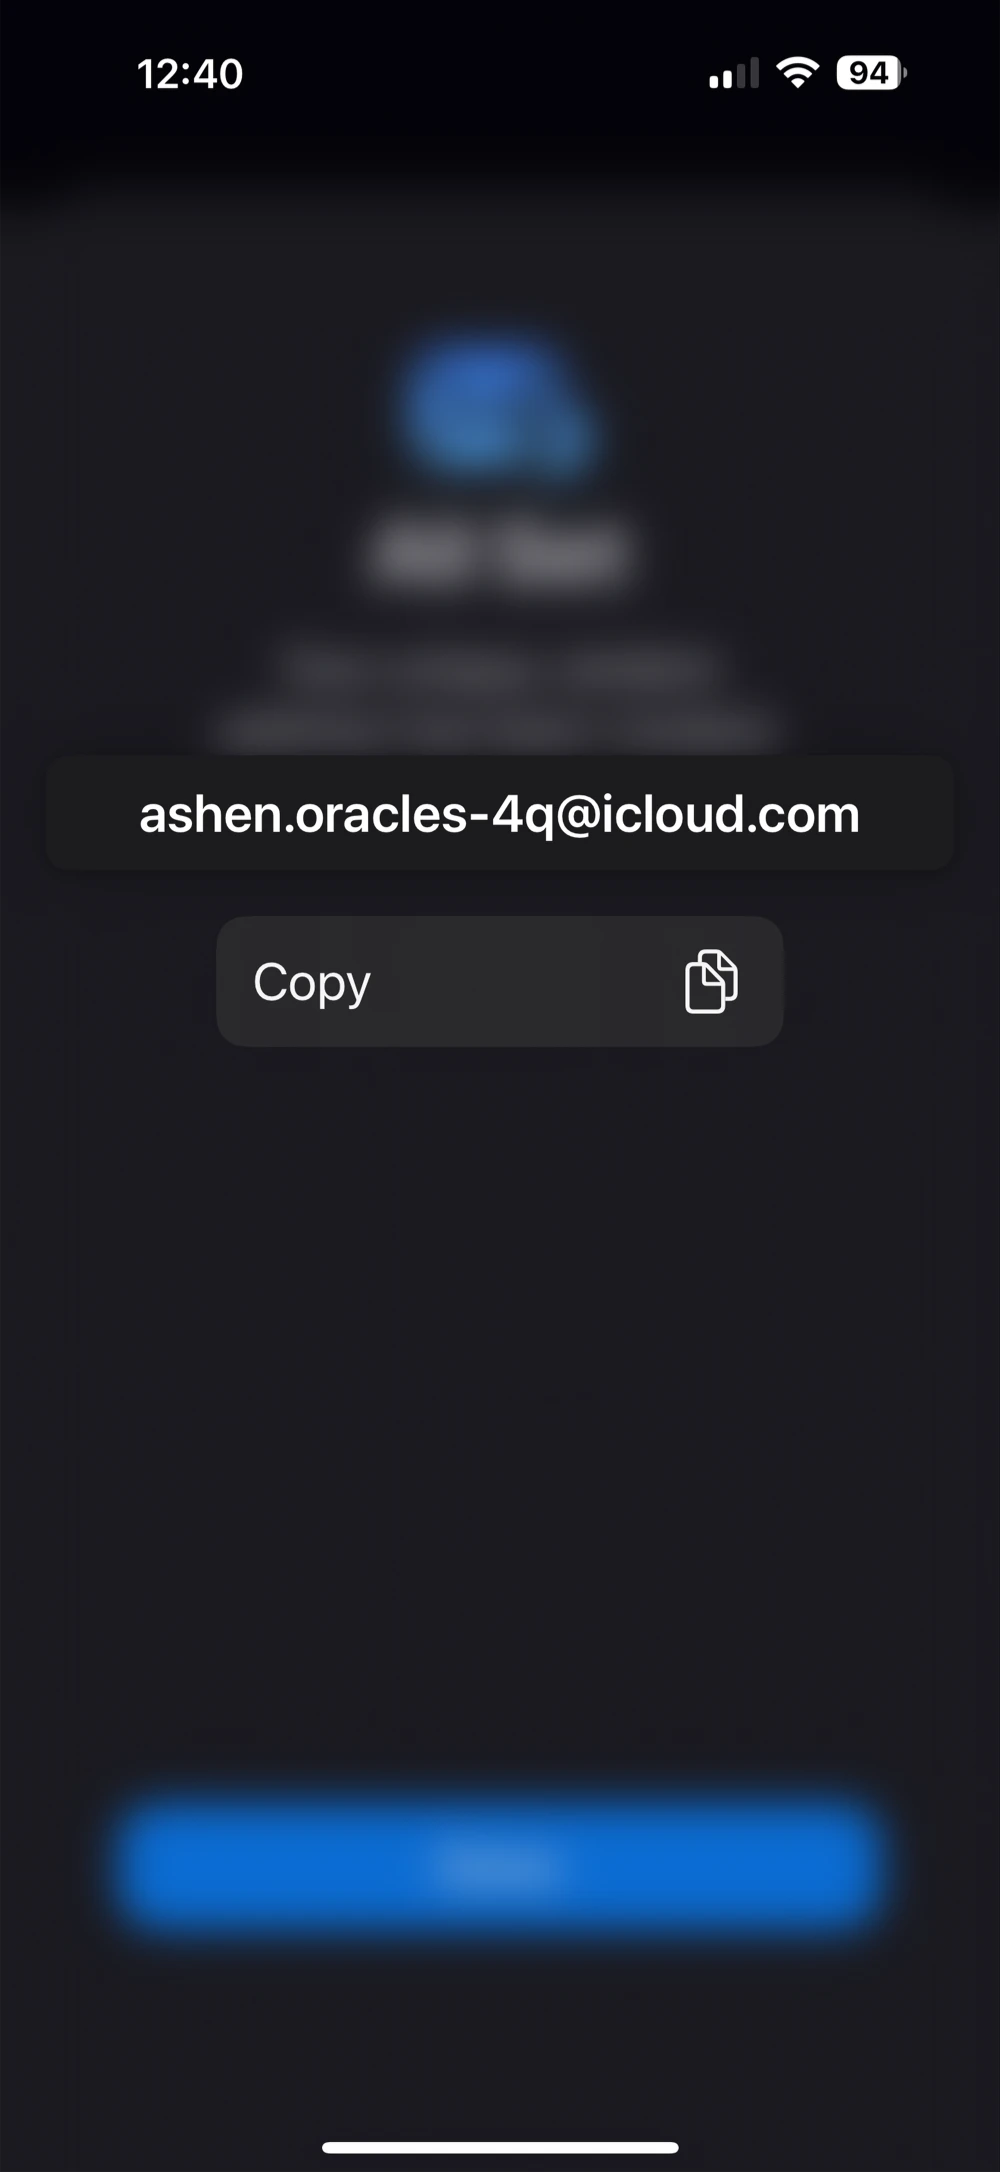
- On the Mac, click the “Copy Address” button after the email is created,
then click “Done”. On iOS, long-press the email address and choose copy. Then
click “Done”.
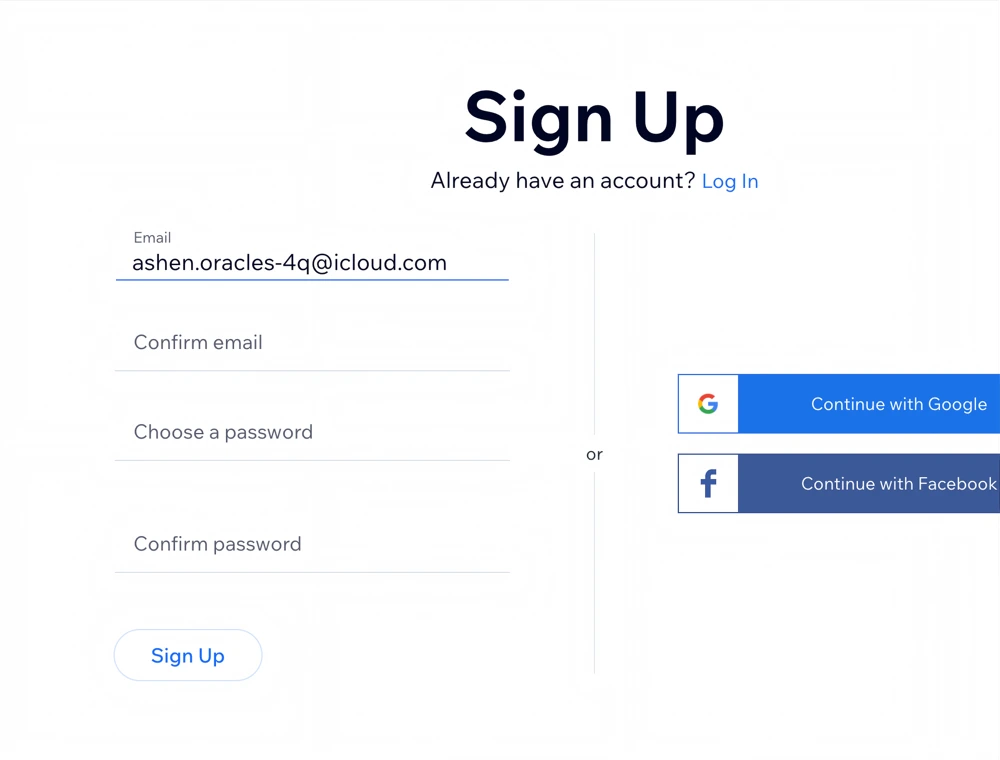
- Paste the email address into the sign-up form on the website or app.
- You can open Hide My Email in iCloud settings at any time to see a list of
your Hide My Email addresses and search for them by email address or label.
You can also choose to deactivate any Hide My Email address you no longer
need.
